반응형


1. Service Node 작성

(앞의 게시물에서 다루었던 AddTwoInts.srv 과정을 진행하지 않았다면 이것부터 진행한다.)


1.1 The Code


패키지 경로로 이동한 후 src/add_two_server.cpp 파일을 생성하고 아래 코드를 붙여넣자.

#include "ros/ros.h"
#include "beginner_tutorials/AddTwoInts.h"

bool add(beginner_tutorials::AddTwoInts::Request  &req,
         beginner_tutorials::AddTwoInts::Response &res)
{
  res.sum = req.a + req.b;
  ROS_INFO("request: x=%ld, y=%ld", (long int)req.a, (long int)req.b);
  ROS_INFO("sending back response: [%ld]", (long int)res.sum);
  return true;
}

int main(int argc, char **argv)
{
  ros::init(argc, argv, "add_two_ints_server");
  ros::NodeHandle n;

  ros::ServiceServer service = n.advertiseService("add_two_ints", add);
  ROS_INFO("Ready to add two ints.");
  ros::spin();

  return 0;
}


1.2 The Code Explained


#include "ros/ros.h"
#include "beginner_tutorials/AddTwoInts.h"

srv파일을 통해 실행되는 헤더파일들을 선언한다.


bool add(beginner_tutorials::AddTwoInts::Request  &req,
         beginner_tutorials::AddTwoInts::Response &res)

함수 선언으로 srv파일에 정의된 대로 2개의 request를 통해 하나의 response를 갖고 최종적으로 boolean값을 return한다.


{
  res.sum = req.a + req.b;
  ROS_INFO("request: x=%ld, y=%ld", (long int)req.a, (long int)req.b);
  ROS_INFO("sending back response: [%ld]", (long int)res.sum);
  return true;
}

response로 정의된 sum은 request되는 변수 a와 b의 합으로 정의된다.

ROS_INFO함수를 통해 request된 값과 reponse되는 값을 출력한다.


ros::ServiceServer service = n.advertiseService("add_two_ints", add);

NodeHandle을 통해 service를 발행하고 누가 쿼리를 날려주면 add함수를 실행하고

정해놓은 service 타입인 beginner_tutorials 패키지의 AddTwoInts.srv로 만들어진 AddTwoInts.h파일을 이용하여

서비스타입을 받아온다. 그 중 Request는 client에서 request하는 값들이고 Response는 client로 보내줄 값들이다.


2. Writing the Client Node


2.1 The Code


src/add_two_ints_client.cpp 파일을 생성하고 아래 코드를 붙여넣자.


#include "ros/ros.h"
#include "beginner_tutorials/AddTwoInts.h"
#include <cstdlib>

int main(int argc, char **argv)
{
  ros::init(argc, argv, "add_two_ints_client");
  if (argc != 3)
  {
    ROS_INFO("usage: add_two_ints_client X Y");
    return 1;
  }

  ros::NodeHandle n;
  ros::ServiceClient client = n.serviceClient<beginner_tutorials::AddTwoInts>("add_two_ints");
  beginner_tutorials::AddTwoInts srv;
  srv.request.a = atoll(argv[1]);
  srv.request.b = atoll(argv[2]);
  if (client.call(srv))
  {
    ROS_INFO("Sum: %ld", (long int)srv.response.sum);
  }
  else
  {
    ROS_ERROR("Failed to call service add_two_ints");
    return 1;
  }

  return 0;
}


2.2 The Code Explained


ros::ServiceClient client = n.serviceClient<beginner_tutorials::AddTwoInts>("add_two_ints");

위의 과정을 통해 add_tow_ints 서비스의 client를 생성한다. ros::ServiceClient 객체는 나중에 서비스를 호출하기 위해 사용된다.


beginner_tutorials::AddTwoInts srv;
srv.request.a = atoll(argv[1]);
srv.request.b = atoll(argv[2]);

argv[1], argv[2] 로 들어온 문자를 longlong 정수형으로 변환하여 request 변수인 a와 b에 저장한다.


if (client.call(srv))

이 부분이 실질적으로 서비스를 호출한다. 서비스 호출이 제대로 완료되면 call()함수가 True를 반환하고 값이 srv에 들어가고

reponse가 가능해진다.


3. Building your nodes


~/catkin_ws/src/beginner_tutorials/CMakeLists.txt 파일의 하단부에 아래 내용을 삽입하여 수정하도록 하자.

add_executable(add_two_ints_server src/add_two_ints_server.cpp)
target_link_libraries(add_two_ints_server ${catkin_LIBRARIES})
add_dependencies(add_two_ints_server beginner_tutorials_gencpp)

add_executable(add_two_ints_client src/add_two_ints_client.cpp)
target_link_libraries(add_two_ints_client ${catkin_LIBRARIES})
add_dependencies(add_two_ints_client beginner_tutorials_gencpp)


이제 catkin_make를 실행하자.

# In your catkin workspace
cd ~/catkin_ws
catkin_make


4. Running the nodes


4.1 Runnning the Server


$ rosrun beginner_tutorials add_two_ints_server

그럼 아래와 같은 문구가 출력되게 된다.

4.2 Running the Client

$ rosrun beginner_tutorials add_two_ints_client 1 3

위의 명령어를 입력하면 client shell과 server shell에서 아래와 같이 각각 출력됨을 확인할 수 있다.


반응형
반응형

C++ 코드를 통해 publisher 노드와 subscriber 노드를 생성해보자.


1. Publisher 노드 작성

노드는 ROS 네트워크에서 실행가능한 하나의 요소로 publisher node(talker) 생성을 통해 메시지를 계속적으로 broadcast하는 노드를 생성해보도록 하겠다.


우선 앞의 과정에서 생성한 beginner_tutorials 패키지로 이동한다.


1.1 The Code


beginner_tutorials 패키지 경로에서 src 폴더를 생성한다.

이 폴더는 beginner_tutorials 패키지의 모든 소스파일을 저장할 곳이다.

src/talker.cpp 파일을 생성하고 다음의 코드를 붙여넣자.

#include "ros/ros.h"
#include "std_msgs/String.h"

#include <sstream>

/**
 * This tutorial demonstrates simple sending of messages over the ROS system.
 */
int main(int argc, char **argv)
{
  /**
   * The ros::init() function needs to see argc and argv so that it can perform
   * any ROS arguments and name remapping that were provided at the command line.
   * For programmatic remappings you can use a different version of init() which takes
   * remappings directly, but for most command-line programs, passing argc and argv is
   * the easiest way to do it.  The third argument to init() is the name of the node.
   *
   * You must call one of the versions of ros::init() before using any other
   * part of the ROS system.
   */
  ros::init(argc, argv, "talker");

  /**
   * NodeHandle is the main access point to communications with the ROS system.
   * The first NodeHandle constructed will fully initialize this node, and the last
   * NodeHandle destructed will close down the node.
   */
  ros::NodeHandle n;

  /**
   * The advertise() function is how you tell ROS that you want to
   * publish on a given topic name. This invokes a call to the ROS
   * master node, which keeps a registry of who is publishing and who
   * is subscribing. After this advertise() call is made, the master
   * node will notify anyone who is trying to subscribe to this topic name,
   * and they will in turn negotiate a peer-to-peer connection with this
   * node.  advertise() returns a Publisher object which allows you to
   * publish messages on that topic through a call to publish().  Once
   * all copies of the returned Publisher object are destroyed, the topic
   * will be automatically unadvertised.
   *
   * The second parameter to advertise() is the size of the message queue
   * used for publishing messages.  If messages are published more quickly
   * than we can send them, the number here specifies how many messages to
   * buffer up before throwing some away.
   */
  ros::Publisher chatter_pub = n.advertise<std_msgs::String>("chatter", 1000);

  ros::Rate loop_rate(10);

  /**
   * A count of how many messages we have sent. This is used to create
   * a unique string for each message.
   */
  int count = 0;
  while (ros::ok())
  {
    /**
     * This is a message object. You stuff it with data, and then publish it.
     */
    std_msgs::String msg;

    std::stringstream ss;
    ss << "hello world " << count;
    msg.data = ss.str();

    ROS_INFO("%s", msg.data.c_str());

    /**
     * The publish() function is how you send messages. The parameter
     * is the message object. The type of this object must agree with the type
     * given as a template parameter to the advertise<>() call, as was done
     * in the constructor above.
     */
    chatter_pub.publish(msg);

    ros::spinOnce();

    loop_rate.sleep();
    ++count;
  }


  return 0;
}


1.2 The Code Explained


# include "ros/ros.h"

ros/ros.h 는 일반적으로 ROS 시스템에서 사용되는 많은 부분들에 대한 필수적인 헤더를 포함하고 있다.


# include "std_msgs/String.h"

std_msgs 패키지에서 사용되는 std_msgs/String 메시지를 사용하기 위한 과정으로 이는 자동으로 패키지 안의 String.msg 파일을 실행하게 된다. 자세한 정보는 링크를 참고 바란다.(wiki.ros.org/msg)


ros::init(argc, argv, "talker");

ROS를 초기화하는 과정으로 노드의 이름을 갖게되고 여기서 이름은 동작되는 시스템에서 유일하게 지정되어야한다.


ros::NodeHandle n;

해당 노드의 핸들러를 만든다. 처음 생성된 NodeHandle은 자동으로 노드를 초기화하고 마지막으로 제거될 때 해당 노드가 사용한 리소스를 정리(cleanup)한다.


ros::Publisher chatter_pub = n.advertise<std_msgs::String>("chatter", 1000);

Topic "chatter"에 대한 std_msgs/String 타입의 메시지를 publish할 것을 Master에게 알리게 된다.

Master는 chatter 을 subscribe하기 원하는 노드를 찾아 이 둘이 직접 연결되게 다.

두번째 argument는 publish queue의 크기를 지정하게 된다.

만약 publishing이 너무 빠르게 되면 이전의 메시지를 버리기 전에 지정된 버퍼 1000을 새롭게 채우는 문제가 발생할 수 있다.


위의 코드를 통해 chatter_pub이라는 이름의 ros::Publisher 객체를 생성하게 되고 advertise()는 해당 토픽으로 publish 가능한 객체인 ros::Publisher 클래스를 반환하며 그 객체의 publish()를 이용하여 원하는 메시지를 발행할 수 있다.


ros::Rate loop_rate(10);

ros::Rate 객체는 반복하고자하는 주기를 설정하게 된다. 위의 경우 10Hz로 반복하게되고 하단의 Rate::sleep()을 통해 지정된 시간을 지키기위해 sleep을 수행한다.


int count = 0;
while (ros::ok())
{

ros::ok()가 False가 될 경우는 아래와 같다.


  * Ctrl+C 의 입력을 받았을 경우

  * 동일한 이름의 다른 노드로 인해 충돌이 발생한 경우

  * 다른 부분에서 ros::shutdown() 이 호출된 경우

  * 모든 ros::NodeHandles 가 종료된 경우


ros::ok() 가 한번 False를 반환하면 다시 ROS를 사용할 수 없다.


std_msgs::String msg;
std::stringstream ss;
ss << "hello world" << count;
msg.data = ss.str();

우리는 msg 파일을 통해 실행된 message-adapted class를 통해 ROS에서 메시지를 broadcasting 한다.

더 복잡한 형태의 데이터타입도 가능하지만 "data" 멤버를 갖는 표준적인 String 메시지를 사용하도록 하겠다.


chatter_pub.publishing(msg);

이제 연결된 노드에게 실질적은 broadcast를 실행한다.


ROS_INFO("%s", msg.data.c_str());

ROS_INFO는 출력을 담당한다.


ros::spinOnce();

본 예제에서는 callback을 받지 않으므로 필수적인 요소는 아니다. 이는 큐에 요청된 콜백함수를 처리하게 된다.

ROS는 여러개의 노드가 비동기 환경에서 작동하는 운영체제이다. 비동기 방식의 경우 어떤 작업을 실행시키고 결과와 상관없이 다음 작업을 수행하게 된다. 즉 A함수를 실행하고 A가 끝나든 말든 B를 시작하는 방식이다. 다만 요청했던 것의 할 일이 끝난 후 처리 결과를 콜백이라는 함수와 함께 알려준다.


2.Writing the Subscriber Node


2.1 The Code


src/listener.cpp 파일을 생성하고 아래의 내용을 붙여넣자.

#include "ros/ros.h"
#include "std_msgs/String.h"

/**
 * This tutorial demonstrates simple receipt of messages over the ROS system.
 */
void chatterCallback(const std_msgs::String::ConstPtr& msg)
{
  ROS_INFO("I heard: [%s]", msg->data.c_str());
}

int main(int argc, char **argv)
{
  /**
   * The ros::init() function needs to see argc and argv so that it can perform
   * any ROS arguments and name remapping that were provided at the command line.
   * For programmatic remappings you can use a different version of init() which takes
   * remappings directly, but for most command-line programs, passing argc and argv is
   * the easiest way to do it.  The third argument to init() is the name of the node.
   *
   * You must call one of the versions of ros::init() before using any other
   * part of the ROS system.
   */
  ros::init(argc, argv, "listener");

  /**
   * NodeHandle is the main access point to communications with the ROS system.
   * The first NodeHandle constructed will fully initialize this node, and the last
   * NodeHandle destructed will close down the node.
   */
  ros::NodeHandle n;

  /**
   * The subscribe() call is how you tell ROS that you want to receive messages
   * on a given topic.  This invokes a call to the ROS
   * master node, which keeps a registry of who is publishing and who
   * is subscribing.  Messages are passed to a callback function, here
   * called chatterCallback.  subscribe() returns a Subscriber object that you
   * must hold on to until you want to unsubscribe.  When all copies of the Subscriber
   * object go out of scope, this callback will automatically be unsubscribed from
   * this topic.
   *
   * The second parameter to the subscribe() function is the size of the message
   * queue.  If messages are arriving faster than they are being processed, this
   * is the number of messages that will be buffered up before beginning to throw
   * away the oldest ones.
   */
  ros::Subscriber sub = n.subscribe("chatter", 1000, chatterCallback);

  /**
   * ros::spin() will enter a loop, pumping callbacks.  With this version, all
   * callbacks will be called from within this thread (the main one).  ros::spin()
   * will exit when Ctrl-C is pressed, or the node is shutdown by the master.
   */
  ros::spin();

  return 0;
}


2.2 The Code Explained


위에서 설명한 부분은 생략하도록 하겠다.

void chatterCallback(const std_msgs::String::ConstPtr& msg)
{
	ROS_INFO("I heard: [%s]", msg->data.c_str());
}

chatter Topic에 대해 새로운 메시지를 수신하게 되면 호출되는 콜백 함수이다.


ros::Subscriber sub = n.subscribe("chatter", 1000, chatterCallback);

chatter 토픽에 대한 메시지를 subscribe한다. ROS는 새로운 메시지가 도착할때마다 chatterCallback() 함수를 호출한다. 2번째 argument는 queue 크기로 queue에 1000 메시지가 가득 차게 되면 오래된 것부터 제거하게 된다.


NodeHandle::subscribe() 함수는 ros::Subscriber 객체를 반환하고 이는 토픽을 unsubscribe할때까지 유지되게 된다.

subscribe() 함수는 메시지를 받아 callback함수에 전달하게 되고 즉 전달받은 메시지를 통해 callback함수가 실행되어 처리되게 된다.


ros::spin();

반복적인 subscribe를 수행하고 callback을 지속적으로 요청한다. publisher의 경우 주기를 사용자가 지정하여 지정된 간격으로 메시지를 보내지만 subscriber는 메시지가 오는 즉시 callback을 요청하고 바로 그 다음 메시지를 기다리게 된다.


3. Building your nodes


CMakeLists.txt 파일을 아래와 같이 수정한다.

CMakeLists.txt 파일에는 패키지 빌드와 catkin에 관련된 설정 정보가 포함되어 있다. catkin 버전, file include경로, 노드 리스트, 라이브러리 의존성 등이 작성되어 있다.

cmake_minimum_required(VERSION 2.8.3)
project(beginner_tutorials)

## Find catkin and any catkin packages
find_package(catkin REQUIRED COMPONENTS roscpp rospy std_msgs genmsg)

## Declare ROS messages and services
add_message_files(FILES Num.msg)
add_service_files(FILES AddTwoInts.srv)

## Generate added messages and services
generate_messages(DEPENDENCIES std_msgs)

## Declare a catkin package
catkin_package()

## Build talker and listener
include_directories(include ${catkin_INCLUDE_DIRS})

add_executable(talker src/talker.cpp)
target_link_libraries(talker ${catkin_LIBRARIES})
add_dependencies(talker beginner_tutorials_generate_messages_cpp)

add_executable(listener src/listener.cpp)
target_link_libraries(listener ${catkin_LIBRARIES})
add_dependencies(listener beginner_tutorials_generate_messages_cpp)

이는 2개의 실행 가능한 노드를 생성하게 된다. (~/catkin_ws/devel/lib/<package name> 확인해보자.)


4. Examing the Simple Publisher and Subscriber


앞에서 publisher 노드와 Subscriber 노드를 생성하였으니 이제 본격적으로 생성한 노드를 테스트해보자.


우선 roscore 실행.

$ roscore


4.1 Generate Publisher node

catkin을 사용하고 있다면 workspace의 setup.sh 파일이 catkin_make 이후에 source되었는지 확인해보자.

# In your catkin workspace
$ cd ~/catkin_ws
$ source ./devel/setup.bash

생성한 pulisher 노드를 실행시키자.

rosrun beginner_tutorials talker

그럼 아래와 같이 출력되는 것을 확인할 수 있다.


4.2 Generate Subscriber node

$ rosrun beginner_tutorials listener

그럼 아래와 같은 결과를 확인할 수 있다.

반응형

'ROS > ROS Wiki' 카테고리의 다른 글

C++로 Service와 Client 노드 생성  (0) 2021.01.06
Creating a ROS msg and srv  (0) 2021.01.05
Using rosed to edit files in ROS  (0) 2021.01.05
Using rqt_console and roslaunch  (0) 2021.01.05
Understanding ROS Services and Parameters  (0) 2021.01.05
반응형

msg와 srv 파일, rosmsg, rossrv, roscp commandline tools를 어떻게 생성하고 빌드하는지 다룬다.

메시지는 publish, subscribe되는 단방향성 데이터 전송을 나타낸다. 따라서 전송되는 데이터의 타입과 데이터 갯수 등을 정의해주게 되고 서비스는 request와 reponse의 양방향성 통신이므로 두 부분을 따로 정의해주게 된다.


1. Introduction to msg and srv

msg: msg파일은 ROS message를 나타내는 간단한 텍스트파일이다. 이는 다른 언어들의 소스코드들을 실행시키는데 사용된다.


srv: srv파일은 서비스를 나타내는 파일로 request와 response의 2가지로 분류된다.

(msg파일은 해당 패키지의 msg dictionary에 저장되고 srv는 srv dictionary에 저장된다.)


msg는 field type과 field name으로 구성된 한 줄로 구성된 텍스트파일로 field type은 다음과 같이 사용 가능하다.


ROS에는 header라는 특별한 타입이 있는데 헤더는 ROS에서 자주 사용되는 타임스탬프와 좌표 정보를 포함하게 된다.

다음은 Header, 문자열, 그리고 2개의 다른 msgs를 사용하는 msg를 나타내었다.

srv파일은 request와 reponse가 있는 것만 제외하고 msg와 거의 동일하다. 두 파트는 '--'로 구분되게 된다.

아래는 srv파일의 예이다.

여기서 request는 64bit integer 형태의 A, B 출력은 Sum 으로 A, B를 요청하여 값을 받으면 Sum이라는 결과를 reponse하게 된다.


2. Using msg

2.1 Create a msg


이전에 다룬 패키지의 새로운 msg를 정의한다.

위의 내용을 통해 msg디렉터리의 Num.msg 파일에 "int64 num" 이라는 문구가 적힌 파일이 생성된다.

아래와 같이 한 줄에 하나의 요소씩 추가하여 파일을 수정할 수 있다.


이제 이 msg파일을 C++이나 python 등의 코드로 변경하는 과정을 진행해야한다.

package.xml 파일을 열어 아래의 두 문장이 주석처리되지 않았음을 확인하자.

catkin_ws/src/beginner_tutorials/ 디렉터리로 이동하여 package.xml파일을 열어보자.

위와 같이 주석처리가 되어있으면 주석을 풀어주자.

(빌드를 진행할땐 message_generation이 필요하고 실행을 할땐 message_runtime이 필요하다.)


이제 CMakeLists.txt를 열어보자.


다음과 같이 message_generation을 dependency에 추가하여(find_package를 찾아 수정하자) 메시지를 시작할 수 있다.

가끔씩 find_package의 모든 dependencies를 호출(call)하지 않아도 잘 빌드될때가 있는데 이는 catkin이 모든 프로젝트를 한번에 묶어 이전에 find_package를 호출한 적이 있다면 같은 값이 들어가기 때문이다. 하지만 이를 독립적으로 실행하게 되면 문제가 발생할 수 있다.


그리고 아래와 같이 catkin_package부분에 message runtime dependency를 추가하도록 하자.


다음으로 아래 부분을 수정하도록 하자.

.msg파일을 직접 추가해줌으로써 다른 .msg파일들이 추가될때 CMake가 확실히 이를 적용시킬 수 있도록 한다.


이제 generate_message() 함수가 확실히 호출될 수 있도록 하자.

이제 msg정의를 통해 source 파일을 실행시킬 준비가 되었다.


3. Using rosmsg

msg가 생성되어있다면 rosmsg 명령을 통해 이를 확인할 수 있다.

그럼 다음의 결과를 확인할 수 있다.

메시지 타입은 크게 2개의 파트로 분류된다.

   * beginner_tutorials -- the package where the message is defined

   * Num -- The name of the msg Num


혹시 어떤 msg가 있는 패키지가 생각나지 않는다면 다음의 코드를 통해 msg파일이 있는 패키지를 확인할 수 있다.


4. Using srv

4.1 Creating a srv


앞에서 사용한 패키지에 srv를 만들어보자.

새로운 srv 정의를 직접 작성하는 대신 다른 패키지에 존재하는 내용을 복사하여 사용하겠다.

다른 패키지에서 파일을 복사하여 사용하기 위해선 roscp 명령어를 사용할 수 있다.


그리고 아래와 같이 package.xml 파일을 수정한다(이 부분은 위에서 다룬 내용으로 이미 진행하였으면 넘어간다).

CMakeLists.txt파일도 아래와 같이 수정하는데 위에서 진행하였다면 넘어가도록 하자.

추가적으로 아래의 부분도 수정하도록 하자.


4.2 Using rossrv


rossrv show 명령어를 통해 해당 파일의 내용을 살펴볼 수 있다.

그럼 다음과 같은 결과를 확인할 수 있다.

그리고 rosmsg와 같이 패키지 이름 없이 service file을 찾을 수 있다.


5. Common step for msg and srv

CMakeLists.txt 파일을 아래와 같이 수정한다(이전에 완료했으면 하지않아도 된다).

이제 새로운 메시지를 생성하였으므로 패키지를 다시 make하자.


6. Getting help


대부분의 ROS 명령어는 -h라는 help 옵션이 존재하여 사용법을 잊었을 때 유용하게 사용할 수 있다.


반응형
반응형

1. Using rosed

rosed는 rosbash의 일부로 패키지 전체의 경로를 입력하지 않고 패키지의 이름을 통해 내부 파일을 직접적으로 설정할 수 있도록 한다.


예제를 통해 roscpp 패키지 안에 있는 Logger.msg 파일을 수정하는 과정을 나타낸다.


2. Using rosed with tab completion

이 방법을 통해 파일의 정확한 이름을 몰라도 패키지의 모든 파일을 쉽게 보고 수정할 수 있다.


3. Editor

rosed의 기본 에디터는 vim을 사용한다.

$ sudo apt-get update
$ sudo apt-get install vim
$ vi ~/.vimrc

위의 과정까지 진행하면 vi 편집기 창이 열리게 되는데 해당 창에서 i를 입력하면 쓰기 모드로 이동하게 된다.

편집기 창에서 쓰기 모드로 전환이 되면 아래의 설정들을 복사하여 해당 편집기 창에 붙여넣자.

(글 복사는 Ctrl+Insert, 붙여넣기는 Shift+Insert)

set number    " line 표시
set ai    " auto indent
set si " smart indent
set cindent    " c style indent
set shiftwidth=4    " 자동 공백 채움 시 4칸
set tabstop=4    " tab을 4칸 공백으로
set ignorecase    " 검색 시 대소문자 무시
set hlsearch    " 검색 시 하이라이트
set nocompatible    " 방향키로 이동 가능
set fileencodings=utf-8,euc-kr    " 파일 저장 인코딩 : utf-8, euc-kr
set fencs=ucs-bom,utf-8,euc-kr    " 한글 파일은 euc-kr, 유니코드는 유니코드
set bs=indent,eol,start    " backspace 사용가능
set ruler    " 상태 표시줄에 커서 위치 표시
set title    " 제목 표시
set showmatch    " 다른 코딩 프로그램처럼 매칭되는 괄호 보여줌
set wmnu    " tab 을 눌렀을 때 자동완성 가능한 목록
syntax on    " 문법 하이라이트 on
filetype indent on    " 파일 종류에 따른 구문 강조
set mouse=a    " 커서 이동을 마우스로 가능하도록

위의 코드에서 " 표시는 C언어의 // 와 같이 한 줄 주석을 의미한다.


그럼 이제 esc를 눌러 입력모드를 빠져나오고 ":"를 입력하여 마지막 라인으로 이동한다.

그럼 ":____" 부분에 "wq"를 입력하여 저장 후 종료한다.

반응형
반응형

ROS에서 디버깅하고 많은 노드들을 동시에 시작하기 위한 rqt_console과 rqt_logger_level을 알아보자.


1. Prerequisites rqt and turtlesim package

이번 과정은 rqt와 turtlesim 패키지를 모두 사용하므로 둘 다 설치를 진행한다.


<distro>는 ROS버전(kinetic, melodic, ...)을 입력한다.

2. Using rqt_console and rqt_logger_level

rqt_console은 ROS의 rogging 프레임워크를 통해 노드들의 결과를 표시해준다.

rqt_logger_level 은 노드들이 실행되면서 동시에 verbosity level(DEBUG, WARN, INFO and ERROR)을 변경할 수 있도록 한다.


rqt_console의 turtlesim의 출력을 확인해보고 rqt_logger_level을 turtlesim으로 변경해보자.

turtlesim을 시작하기 전에 새로운 터미널창을 열고 rqt_console과 rqt_logger_level을 실행하자.


그럼 아래와 같은 창이 팝업되게 된다.


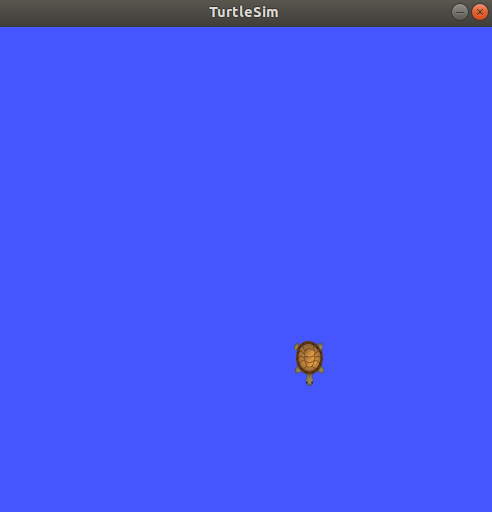
그럼 이제 아래 명령어를 통해 turtlesim_node를 실행시키자.


기본으로 설정된 logger level이 INFO이므로 turtlesim 이 publish하는 정보들을 확인할 수 있게 된다.


이제 logger level을 WARN으로 변경해보자.


그리고 아래 코드를 입력하여 보면

콘솔에 아래와 같은 Warn 메시지들이 출력되는 것을 확인할 수 있다.


2.1 Quick Note about logger levels

Logging levels는 다음의 순서로 우선순위가 정해지게 된다.

Fatal은 가장 높은 우선순위를 갖고 Debug는 가장 낮은 우선순위를 갖는다. logger level을 설정함으로써 priority level 이상의 메시지들을 받게 된다. 예를들어, logger level을 WARN으로 설정하면 모든 Warn, Error, Fatal logging messages를 받게 된다.


그럼 이제 turtlesim 노드를 종료하고 다수의 turtlesim 노드들을 실행하기 위해 roslaunch를 사용해보자.


2.2 Using roslaunch

roslaunch는 launch file에 정의된대로 노드들을 실행하게 된다.

우선 앞에서 생성하고 빌드했던 beginner_tutorials 패키지의 경로로 이동하자.

만약 위의 명령에서 "roscd:No such package/stack 'beginner_tutorials'" 라는 에러가 출력되면 setup파일의 설정을 source하여 저장해야한다.

(참고: wiki.ros.org/catkin/Tutorials/create_a_workspace)


다음 launch 폴더를 생성한다.

2.3 The Launch File

이제 turtlemimic.launch 라는 파일을 생성하고 아래 내용을 복붙하자.

$ gedit turtlemimic.launch


<launch>

  <group ns="turtlesim1">
    <node pkg="turtlesim" name="sim" type="turtlesim_node"/>
  </group>

  <group ns="turtlesim2">
    <node pkg="turtlesim" name="sim" type="turtlesim_node"/>
  </group>

  <node pkg="turtlesim" name="mimic" type="mimic">
    <remap from="input" to="turtlesim1/turtle1"/>
    <remap from="output" to="turtlesim2/turtle1"/>
  </node>

</launch>

2.4 The Launch File Explained


위의 코드에서 가장 위에 <launch> 는 해당 파일이 launch file임을 나타낸다.


그리고 첫번째, 두번째 문단을 통해 sim이라는 이름의 2가지 노드(turtlesim1, turtlesim2)를 정의하고

이는 충돌없이 두개의 시뮬레이터가 잘 작동할 수 있도록 해준다.


마지막 문단은 각각의 노드들의 입/출력을 설정하는 과정으로 turtlesim2가 turtlesim1을 따라하도록 설정한 것이다.


마지막 </launch>는 launch file의 xml을 닫도록 하는 것이다.


2.5 roslaunching

이제 해당 파일을 roslaunch 해보자.

그럼 거북이 창이 2개 뜨는 것을 확인할 수 있다.


하나의 명령을 통해 2개의 거북이가 동시에 움직이는 것을 확인할 수 있다.

그럼 rqt_graph를 통해 관계를 조금 더 자세히 알아보자.


turtlesim1이 움직임의 메시지를 subscribe하고 mimic 노드를 통해 turtlesim2가 turtlesim1을 따라가는 관계임을 볼 수 있다.

반응형

'ROS > ROS Wiki' 카테고리의 다른 글

Creating a ROS msg and srv  (0) 2021.01.05
Using rosed to edit files in ROS  (0) 2021.01.05
Understanding ROS Services and Parameters  (0) 2021.01.05
Understanding ROS Topics  (0) 2021.01.04
Understanding ROS Nodes  (0) 2021.01.03
반응형

1. ROS Services

서비스는 노드 사이 통신을 위한 또다른 방법이다. 서비스는 노드들에게 Request를 보내고 Response를 받게 된다.

앞에서 다룬 Topic과의 차이는 아래 그림을 통해 쉽게 이해할 수 있다.

Topic은 데이터가 지속적으로 전달되어지는 데이터 스트림에 적합한 비동기식 통신 방법인 반면, 서비스는 대기/응답(Request/Response) 방식의 통신으로 동기식 통신 방법을 의미한다.


2. Using rosservice

rosservice는 ROS의 client/service 프레임워크의 일부로 많은 명령어들이 존재한다.

* setup

$ roscore
$ rosrun turtlesim turtlesim_node
$ rosrun turtlesim turtle_teleop_key


2.1 rosservice list


list는 현재 가동중인 노드의 활성화된 서비스에 대한 정보를 출력하는 것으로, roscore만 실행한 후 이를 진행해보면

위의 결과를 확인할 수 있고 setup과정의 모든 노드를 실행하고 list를 확인하여 보면

위의 결과를 확인할 수 있다.


즉, turtlesim 노드는 9개의 서비스(reset, kill, clear, spawn, turtle1/set_pen, ... , turtlesim/get_logger_level)를 나타내고

turtle_teleop_key 노드는 2개의 서비스(teleop_turtle/get_loggers, teleop_turtle/set_logger_level)를 나타내며

rosout 노드에서 2개의 서비스를 나타내는 것을 확인할 수 있다.


2.2 rosservice type


turtlesim 의 clear 서비스의 타입을 살펴보자.

서비스가 empty로  표시되는데 이는 서비스가 호출될 때 전달된 인자가 없다는 것을 의미한다.

(Request할때 어떠한 데이터를 전송하지도 않고 Response할때 어떠한 데이터도 받지 않는다.)

그럼 이제 clear service를 rosservice call 을 이용하여 호출하여 보자.


2.3 rosservice call


위의 내용은 turtlesim_node의 clear 서비스를 실행시키는 것으로 거북이가 움직인 경로(background)를 초기화한다.


service가 전달인자를 갖는 경우를 살펴보기 위해 spwan service를 살펴보자.


spwan 서비스는 새로운 거북이를 주어진 방향과 위치로 생성한다(name 부분은 선택사항이다).

위의 명령어를 실행하면 새로 생성된 거북이의 이름을 return하고 아래와 같이 한마리가 추가된다.

내요은 /spawn 서비스를 호출하는데 x값에 해당하는 값에 2, y값에 해당하는 값에도 2, theta값에 0.2값을 넣어준 것이다.

마지막의 ""는 turtlesim의 이름을 지정하는 부분으로 공백으로 사용하여 임의의 값을 얻어오고자 함이다.


3. Using rosparam

ROS에서의 파라미터는 전역변수(Global variable)와 같은 역할을 한다.

rosparam은 사용자가 ROS 파라미터 서비스의 데이터를 저장하거나 조종하는 것을 허용하며 integer, float, boolean, dictionary, list 타입의 데이터를 저장할 수 있고 YAML 마크업언어 문법을 사용한다.

*YAML은 "또 다른 마크업 언어(Yet Another Markup Language)" 이며 사람이 쉽게 읽을 수 있는 데이터 직렬화 양식으로 가벼운 마크업 언어로 사용하고 있다(최근에는 XML, JSON이 데이터 직렬화에 주로 쓰인다).


$ rosparam

위의 명령어를 통해 옵션들을 확인해볼 수 있다.


3.1 rosparam list

rosparam list를 통해 현재 노드들에서 활성화된 파라미터들을 확인할 수 있고 turtlesim 노드에서 배경색에 대한 3가지의

parameters가 존재함을 확인할 수 있다.

그럼 rosparam set을 이용하여 파라미터를 수정하여보자.


3.2 rosparam set and rosparam get

현재 배경의 RGB값을 확인하여보면 위와 같다.

Parameter Server의 모든 내용을 확인하고자 하면 다음과 같이 진행한다.


그럼 set을 통해 값을 변경해보자.


3.3 rosparam dump and rosparam load


rosparam을 이용하여 정보들을 저장하여 추후에 다시 불러올 수 있도록 해보자.

아래 명령어를 통해 모든 parameters를 params.yaml로 저장한다.

또한 저장된 yaml파일을 새로운 namespace에 저장하여 사용할 수 있다.

반응형

'ROS > ROS Wiki' 카테고리의 다른 글

Using rosed to edit files in ROS  (0) 2021.01.05
Using rqt_console and roslaunch  (0) 2021.01.05
Understanding ROS Topics  (0) 2021.01.04
Understanding ROS Nodes  (0) 2021.01.03
Building a ROS Package  (0) 2020.12.31
반응형

1. Setup

$ roscore
$ rosrun turtlesim turtlesim_node
$ rosrun turtlesim turtle_teleop_key


2. ROS Topics

위의 setup과정에서 실행한 turtlesim_node와 turtle_teleop_key 노드들은 ROS Topic을 통해 서로 통신하게 된다.

tuetle_teleop_key는 키보드의 입력을 publishing하게 되고 tuetlesim_node 노드는 같은 Topic을 subscribe하여 키의 입력을 전달받데 된다. 구조는 rqt_graph를 이용하여 쉽게 시각화시킬 수 있다.


2.1 Using rqt_graph

rqt_graph는 ROS 시스템의 구성을 그래프로 보여주는 도구로 rqt package의 한 부분이다.

아래 명령어를 통해 작업을 진행한다.

(위의 내용에서 <distro>는 kinetic, melodic, ... 등으로 대체된다.)

그럼 아래 명령어를 통해 Setup과정에서 진행한 ROS시스템의 구성을 살펴보자.

위의 그래프를 통해 /turtle1/command_velocity 라는 이름의 Topic에 대해 /teleop_turtle 노드와 tutlesim 노드가 메시지(데이터)를 통신하는 관계임을 확인할 수 있다.


2.2 Introducing rostopic

rostopic 툴은 ROS Topics에 대한 정보를 얻기 위한 도구이다.


2.3 Using rostopic echo

rostopic echo는 토픽에 대해 publish된 내용들을 표시해준다.

위와 같은 구조로 사용하게 되고 이를 예제 적용하여 보면

위의 명령어를 입력한 후 teleop_key 터미널창에 방향키 입력을 통해 거북이를 움직여보면 값이 변화하는 것을 확인할 수 있다.

이제 rqt_graph를 확인하여 보면 아래와 같이 붉은색으로 rostopic echo 노드가 생성되어 turtle1/command_velocity 토픽을

subscribe 하는것을 확인할 수 있다.


즉, turtle1/cmd_vel topic에 대해 teleop_turtle노드는 입력받는 키에 대한 정보를 publish하고 이를 나타내는 turtlesim 노드와 회전각 및 이동량을 전달받는 rostopic echo 노드가 topic을 subscribe하는 것을 확인할 수 있다.


2.4 Using rostopic list

rostopic list는 현재 topic에 대해 subscribe 및 publish 되는 노드들의 정보를 나타낸다.

rostopic list에 대한 argument들은 다음 명령어를 통해 확인할 수 있다.


3. ROS Messages

Topic들에 대한 통신(Communication)은 노드들 사이에 ROS 메시지를 전송함으로서 진행된다.

publisher(turtle_teleop_key)와 subscriber(turtlesim_node)가 통신하기 위해서는 각각 동일한 타입의 메시지를 송수신 하여야 한다.

즉, topic의 타입은 publish되는 메시지의 타입에 따라 정의되게 되고 이러한 토픽에 전송되는 메시지는 rostopic 타입을 통해 결정된다.


3.1 Using rostopic type

rostopic type는 publish되는 메시지 타입들을 보여준다.


우리의 예를 들면

위의 명령어를 통해 turtle1/cmd_vel 이라는 Topic의 메시지 타입을 확인하면 아래와 같은 결과를 확인할 수 있다.

그리고 메시지의 자세한 정보를 위해 rosmsg를 아래와 같이 사용하면 결과를 확인할 수 있다.


즉, geometry_msgs/Twist 라는 데이터 형은 직선방향, 각도에 대한 데이터형이고 이는 float64형임을 확인할 수 있다.


4. rostopic continued

4.1 Using rostopic pub

rostopic pub은 현재 토픽에서의 데이터를 publish한다.


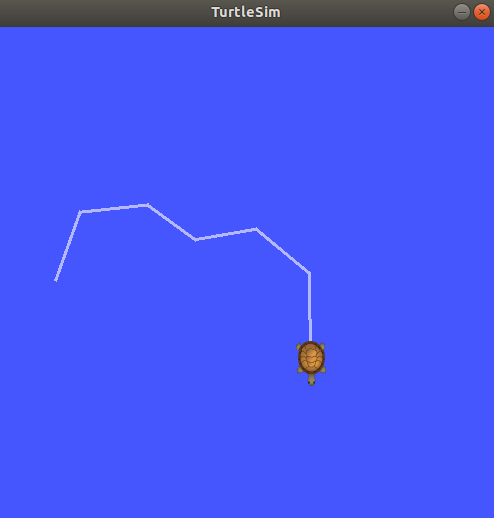
위의 명령은 turtlesim 노드에게 직선속도 2.0과 각속도 1.8을 갖고 움직여라 라는 의미를 담고있다.


그럼 위와 같은 결과를 볼 수 있다.


굉장히 복잡한 명령어이므로 자세히 살펴보자.


우선 가장 앞에 등장하는 rostopic pub은 해당 topic에게 메시지를 전송하겠다는 것을 의미한다.


*  -1(dash-one) 은 한번의 메시지만 publish한 후 종료하라는 의미를 담고있다.

*  turtle1/cmd_vel 은 publish할 토픽의 이름을 나타낸다.

*  geometry_msgs/Twist 는 topic을 publish할 때, 메시지의 타입을 나타낸다.

*  --(double dash)는 해당 argument에 값을 넣어주지 않기 위한 과정이다.

*  앞에서와 같이 geometry/Twist 메시지는 각각 3개의 floating 요소들로 구성된다.


그리고 거북이를 계속 움직이기 위해선 아래 명령어와 같이 rostopic pub -r  명령어를 사용하자.


이 과정을 rqt를 이용해서 확인하여보면 아래와 같다.


보면 subscribe 노드는 rostopic echo 노드와 turtlesim 노드, publish는 teleop_turtle노드와 추가적으로

새로운 노드가 생성된 것을 확인할 수 있다.


즉 teleop_turtle로 키 입력을 받는 것 외에 계속적으로 움직임을 가질 수 있도록 새로운 노드가 생성되어 publish하는 것을

확인할 수 있다.


4.2 Using rostopic hz

rostopic hz는 어떤 데이터들이 publish 되는지 확인할 수 있다.

보면 average rate가 60과 가까운 것을 확인할 수 있고 이는 turtlesim 노드가 pose에 대한 데이터는 60Hz로 Publish 한다는

것을 의미한다.


5. Using rqt_plot

rqt_plot은 topics에 대해 publish되는 데이터의 연속적인 값들을 보여준다.


위의 명령어를 통해 rqt_plot을 진행하고 상단의 Topic에 그래프로 나타내고자 하는 토픽을 지정하고 옆의 + 버튼을 누르자.


근데 우분투 18.04버전을 진행함에 있어 다음과 같은 에러가 발생한다.

창의 크기를 조절하게 되면 다음과 같은 결과를 출력하며 강제 종료되게 된다.


이는 matplotlib 내부에 존재하는 문제로 아직 해결책을 찾지는 못하였지만 대체 방안으로 창을 최대화하면 보이는 것을 확인할 수 있다.


아래 링크는 해당 문제가 발생한 것에 대한 참고 링크이다.


github.com/ros-visualization/rqt_plot/issues/35


Error when re-arranging widgets over plot. Kinetic, 16.04 · Issue #35 · ros-visualization/rqt_plot

When I try to re-arrange widgets in rqt, whenever I pass with it over a plot widget, I get the error: Traceback (most recent call last): File "/opt/ros/kinetic/lib/python2.7/dist-packages/qt_g...

github.com


반응형

'ROS > ROS Wiki' 카테고리의 다른 글

Using rqt_console and roslaunch  (0) 2021.01.05
Understanding ROS Services and Parameters  (0) 2021.01.05
Understanding ROS Nodes  (0) 2021.01.03
Building a ROS Package  (0) 2020.12.31
Creating a ROS Package  (0) 2020.12.31
반응형

1. Prerequisites

우선 간단한 시뮬레이터를 사용하기 위해 아래 코드를 입력한다.

$ sudo apt-get install ros-<버전이름>-ros-tutorials
(버전이름으로 melodic, kinetic 등을 사용)


2. Quick Overview of Graph Concepts

* nodes: 실행가능한 요소로 ROS에서 다른 노드들과 통신을 위해 사용된다.

* Messages: 토픽을 publish, subscribing 함에 있어 전달되는 ROS 데이터의 타입이다.

* Topics: 노드들은 토픽에 대한 메시지를 publish 하거나 subscribe할 수 있다.

* Master: 노드들이 서로를 찾을 수 있도록 한다.

* rosout: stdout/stderr 역할을 수행

* roscore: Master + rosout + parameter server 수행


3. Nodes

ROS 패키지 안의 노드들은 실행 가능한 파일들보다 적다. ROS에서 노드들은 ROS client library를 통해

서로 통신하게 되고 노드들은 Topic에 publish(send message) 혹은 subscribe(receive message) 수행.


4. Client Libraries

ROS client libraries는 각각 다른 언어로 작성된 노드들이 서로 통신할 수 있도록 한다.

* rospy = python client library

* roscpp = c++ client library


5. Roscore

ROS를 사용할때 가장먼저 시작되어야 할 부분으로 roscore을 실행하면 다음과 같은 결과를 확인할 수 있다.


6. Using rosnode

새로운 터미널을 열어 roscore을 실행시킨 후 rosnode를 입력하면 roscore가 무슨 일을 하는지 확인해볼 수 있다.


$ rosnode list  를 입력하면

/ rosout  이라는 출력을 확인할 수 있다.


이는 현재 하나의 노드(rosout 노드)가 실행중임을 의미한다. 해당 노드에 대한 자세한 정보를 확인하고 싶으면

아래 명령어를 입력한다.


이제 그럼 조금 더 다양한 노드들을 사용해보자.


7. Using rosrun

rosrun은 패키지 안의 노드를 바로 실행시킨다.

예를들어


위의 명령어를 입력하면 turtlesim 패키지 안의 turtlesim_node 가 실행된다.

이런 거북이가 보이게 되는데 이때 rosnode list를 통해 노드들을 확인해보면 아래와 같다.


반응형

'ROS > ROS Wiki' 카테고리의 다른 글

Using rqt_console and roslaunch  (0) 2021.01.05
Understanding ROS Services and Parameters  (0) 2021.01.05
Understanding ROS Topics  (0) 2021.01.04
Building a ROS Package  (0) 2020.12.31
Creating a ROS Package  (0) 2020.12.31

+ Recent posts