C++ 코드를 통해 publisher 노드와 subscriber 노드를 생성해보자.
1. Publisher 노드 작성
노드는 ROS 네트워크에서 실행가능한 하나의 요소로 publisher node(talker) 생성을 통해 메시지를 계속적으로 broadcast하는 노드를 생성해보도록 하겠다.
우선 앞의 과정에서 생성한 beginner_tutorials 패키지로 이동한다.

1.1 The Code
beginner_tutorials 패키지 경로에서 src 폴더를 생성한다.

이 폴더는 beginner_tutorials 패키지의 모든 소스파일을 저장할 곳이다.
src/talker.cpp 파일을 생성하고 다음의 코드를 붙여넣자.
#include "ros/ros.h"
#include "std_msgs/String.h"

#include <sstream>

/**
 * This tutorial demonstrates simple sending of messages over the ROS system.
 */
int main(int argc, char **argv)
{
  /**
   * The ros::init() function needs to see argc and argv so that it can perform
   * any ROS arguments and name remapping that were provided at the command line.
   * For programmatic remappings you can use a different version of init() which takes
   * remappings directly, but for most command-line programs, passing argc and argv is
   * the easiest way to do it.  The third argument to init() is the name of the node.
   *
   * You must call one of the versions of ros::init() before using any other
   * part of the ROS system.
   */
  ros::init(argc, argv, "talker");

  /**
   * NodeHandle is the main access point to communications with the ROS system.
   * The first NodeHandle constructed will fully initialize this node, and the last
   * NodeHandle destructed will close down the node.
   */
  ros::NodeHandle n;

  /**
   * The advertise() function is how you tell ROS that you want to
   * publish on a given topic name. This invokes a call to the ROS
   * master node, which keeps a registry of who is publishing and who
   * is subscribing. After this advertise() call is made, the master
   * node will notify anyone who is trying to subscribe to this topic name,
   * and they will in turn negotiate a peer-to-peer connection with this
   * node.  advertise() returns a Publisher object which allows you to
   * publish messages on that topic through a call to publish().  Once
   * all copies of the returned Publisher object are destroyed, the topic
   * will be automatically unadvertised.
   *
   * The second parameter to advertise() is the size of the message queue
   * used for publishing messages.  If messages are published more quickly
   * than we can send them, the number here specifies how many messages to
   * buffer up before throwing some away.
   */
  ros::Publisher chatter_pub = n.advertise<std_msgs::String>("chatter", 1000);

  ros::Rate loop_rate(10);

  /**
   * A count of how many messages we have sent. This is used to create
   * a unique string for each message.
   */
  int count = 0;
  while (ros::ok())
  {
    /**
     * This is a message object. You stuff it with data, and then publish it.
     */
    std_msgs::String msg;

    std::stringstream ss;
    ss << "hello world " << count;
    msg.data = ss.str();

    ROS_INFO("%s", msg.data.c_str());

    /**
     * The publish() function is how you send messages. The parameter
     * is the message object. The type of this object must agree with the type
     * given as a template parameter to the advertise<>() call, as was done
     * in the constructor above.
     */
    chatter_pub.publish(msg);

    ros::spinOnce();

    loop_rate.sleep();
    ++count;
  }


  return 0;
}
1.2 The Code Explained
# include "ros/ros.h"ros/ros.h 는 일반적으로 ROS 시스템에서 사용되는 많은 부분들에 대한 필수적인 헤더를 포함하고 있다.
# include "std_msgs/String.h"std_msgs 패키지에서 사용되는 std_msgs/String 메시지를 사용하기 위한 과정으로 이는 자동으로 패키지 안의 String.msg 파일을 실행하게 된다. 자세한 정보는 링크를 참고 바란다.(wiki.ros.org/msg)
ros::init(argc, argv, "talker");ROS를 초기화하는 과정으로 노드의 이름을 갖게되고 여기서 이름은 동작되는 시스템에서 유일하게 지정되어야한다.
ros::NodeHandle n;해당 노드의 핸들러를 만든다. 처음 생성된 NodeHandle은 자동으로 노드를 초기화하고 마지막으로 제거될 때 해당 노드가 사용한 리소스를 정리(cleanup)한다.
ros::Publisher chatter_pub = n.advertise<std_msgs::String>("chatter", 1000);Topic "chatter"에 대한 std_msgs/String 타입의 메시지를 publish할 것을 Master에게 알리게 된다.
Master는 chatter 을 subscribe하기 원하는 노드를 찾아 이 둘이 직접 연결되게 다.
두번째 argument는 publish queue의 크기를 지정하게 된다.
만약 publishing이 너무 빠르게 되면 이전의 메시지를 버리기 전에 지정된 버퍼 1000을 새롭게 채우는 문제가 발생할 수 있다.
위의 코드를 통해 chatter_pub이라는 이름의 ros::Publisher 객체를 생성하게 되고 advertise()는 해당 토픽으로 publish 가능한 객체인 ros::Publisher 클래스를 반환하며 그 객체의 publish()를 이용하여 원하는 메시지를 발행할 수 있다.
ros::Rate loop_rate(10);ros::Rate 객체는 반복하고자하는 주기를 설정하게 된다. 위의 경우 10Hz로 반복하게되고 하단의 Rate::sleep()을 통해 지정된 시간을 지키기위해 sleep을 수행한다.
int count = 0;
while (ros::ok())
{
ros::ok()가 False가 될 경우는 아래와 같다.
* Ctrl+C 의 입력을 받았을 경우
* 동일한 이름의 다른 노드로 인해 충돌이 발생한 경우
* 다른 부분에서 ros::shutdown() 이 호출된 경우
* 모든 ros::NodeHandles 가 종료된 경우
ros::ok() 가 한번 False를 반환하면 다시 ROS를 사용할 수 없다.
std_msgs::String msg;
std::stringstream ss;
ss << "hello world" << count;
msg.data = ss.str();
우리는 msg 파일을 통해 실행된 message-adapted class를 통해 ROS에서 메시지를 broadcasting 한다.
더 복잡한 형태의 데이터타입도 가능하지만 "data" 멤버를 갖는 표준적인 String 메시지를 사용하도록 하겠다.
chatter_pub.publishing(msg);이제 연결된 노드에게 실질적은 broadcast를 실행한다.
ROS_INFO("%s", msg.data.c_str());ROS_INFO는 출력을 담당한다.
ros::spinOnce();본 예제에서는 callback을 받지 않으므로 필수적인 요소는 아니다. 이는 큐에 요청된 콜백함수를 처리하게 된다.
ROS는 여러개의 노드가 비동기 환경에서 작동하는 운영체제이다. 비동기 방식의 경우 어떤 작업을 실행시키고 결과와 상관없이 다음 작업을 수행하게 된다. 즉 A함수를 실행하고 A가 끝나든 말든 B를 시작하는 방식이다. 다만 요청했던 것의 할 일이 끝난 후 처리 결과를 콜백이라는 함수와 함께 알려준다.
2.Writing the Subscriber Node
2.1 The Code
src/listener.cpp 파일을 생성하고 아래의 내용을 붙여넣자.
#include "ros/ros.h"
#include "std_msgs/String.h"

/**
 * This tutorial demonstrates simple receipt of messages over the ROS system.
 */
void chatterCallback(const std_msgs::String::ConstPtr& msg)
{
  ROS_INFO("I heard: [%s]", msg->data.c_str());
}

int main(int argc, char **argv)
{
  /**
   * The ros::init() function needs to see argc and argv so that it can perform
   * any ROS arguments and name remapping that were provided at the command line.
   * For programmatic remappings you can use a different version of init() which takes
   * remappings directly, but for most command-line programs, passing argc and argv is
   * the easiest way to do it.  The third argument to init() is the name of the node.
   *
   * You must call one of the versions of ros::init() before using any other
   * part of the ROS system.
   */
  ros::init(argc, argv, "listener");

  /**
   * NodeHandle is the main access point to communications with the ROS system.
   * The first NodeHandle constructed will fully initialize this node, and the last
   * NodeHandle destructed will close down the node.
   */
  ros::NodeHandle n;

  /**
   * The subscribe() call is how you tell ROS that you want to receive messages
   * on a given topic.  This invokes a call to the ROS
   * master node, which keeps a registry of who is publishing and who
   * is subscribing.  Messages are passed to a callback function, here
   * called chatterCallback.  subscribe() returns a Subscriber object that you
   * must hold on to until you want to unsubscribe.  When all copies of the Subscriber
   * object go out of scope, this callback will automatically be unsubscribed from
   * this topic.
   *
   * The second parameter to the subscribe() function is the size of the message
   * queue.  If messages are arriving faster than they are being processed, this
   * is the number of messages that will be buffered up before beginning to throw
   * away the oldest ones.
   */
  ros::Subscriber sub = n.subscribe("chatter", 1000, chatterCallback);

  /**
   * ros::spin() will enter a loop, pumping callbacks.  With this version, all
   * callbacks will be called from within this thread (the main one).  ros::spin()
   * will exit when Ctrl-C is pressed, or the node is shutdown by the master.
   */
  ros::spin();

  return 0;
}
2.2 The Code Explained
위에서 설명한 부분은 생략하도록 하겠다.
void chatterCallback(const std_msgs::String::ConstPtr& msg)
{
	ROS_INFO("I heard: [%s]", msg->data.c_str());
}
chatter Topic에 대해 새로운 메시지를 수신하게 되면 호출되는 콜백 함수이다.
ros::Subscriber sub = n.subscribe("chatter", 1000, chatterCallback);chatter 토픽에 대한 메시지를 subscribe한다. ROS는 새로운 메시지가 도착할때마다 chatterCallback() 함수를 호출한다. 2번째 argument는 queue 크기로 queue에 1000 메시지가 가득 차게 되면 오래된 것부터 제거하게 된다.
NodeHandle::subscribe() 함수는 ros::Subscriber 객체를 반환하고 이는 토픽을 unsubscribe할때까지 유지되게 된다.
subscribe() 함수는 메시지를 받아 callback함수에 전달하게 되고 즉 전달받은 메시지를 통해 callback함수가 실행되어 처리되게 된다.
ros::spin();반복적인 subscribe를 수행하고 callback을 지속적으로 요청한다. publisher의 경우 주기를 사용자가 지정하여 지정된 간격으로 메시지를 보내지만 subscriber는 메시지가 오는 즉시 callback을 요청하고 바로 그 다음 메시지를 기다리게 된다.
3. Building your nodes
CMakeLists.txt 파일을 아래와 같이 수정한다.
CMakeLists.txt 파일에는 패키지 빌드와 catkin에 관련된 설정 정보가 포함되어 있다. catkin 버전, file include경로, 노드 리스트, 라이브러리 의존성 등이 작성되어 있다.
cmake_minimum_required(VERSION 2.8.3)
project(beginner_tutorials)

## Find catkin and any catkin packages
find_package(catkin REQUIRED COMPONENTS roscpp rospy std_msgs genmsg)

## Declare ROS messages and services
add_message_files(FILES Num.msg)
add_service_files(FILES AddTwoInts.srv)

## Generate added messages and services
generate_messages(DEPENDENCIES std_msgs)

## Declare a catkin package
catkin_package()

## Build talker and listener
include_directories(include ${catkin_INCLUDE_DIRS})

add_executable(talker src/talker.cpp)
target_link_libraries(talker ${catkin_LIBRARIES})
add_dependencies(talker beginner_tutorials_generate_messages_cpp)

add_executable(listener src/listener.cpp)
target_link_libraries(listener ${catkin_LIBRARIES})
add_dependencies(listener beginner_tutorials_generate_messages_cpp)
이는 2개의 실행 가능한 노드를 생성하게 된다. (~/catkin_ws/devel/lib/<package name> 확인해보자.)
4. Examing the Simple Publisher and Subscriber
앞에서 publisher 노드와 Subscriber 노드를 생성하였으니 이제 본격적으로 생성한 노드를 테스트해보자.
우선 roscore 실행.
$ roscore
4.1 Generate Publisher node
catkin을 사용하고 있다면 workspace의 setup.sh 파일이 catkin_make 이후에 source되었는지 확인해보자.
# In your catkin workspace
$ cd ~/catkin_ws
$ source ./devel/setup.bash
생성한 pulisher 노드를 실행시키자.
rosrun beginner_tutorials talker그럼 아래와 같이 출력되는 것을 확인할 수 있다.

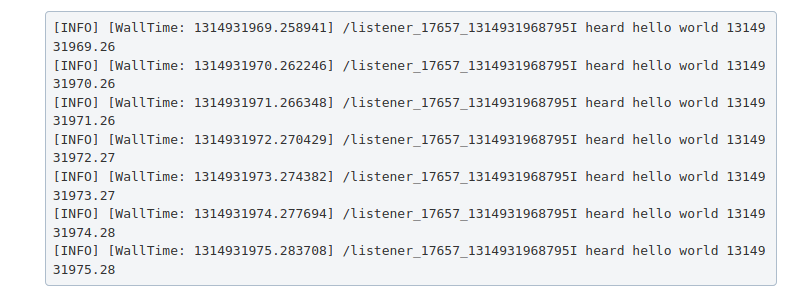
4.2 Generate Subscriber node
$ rosrun beginner_tutorials listener그럼 아래와 같은 결과를 확인할 수 있다.
'ROS > ROS Wiki' 카테고리의 다른 글
| C++로 Service와 Client 노드 생성 (0) | 2021.01.06 |
|---|---|
| Creating a ROS msg and srv (0) | 2021.01.05 |
| Using rosed to edit files in ROS (0) | 2021.01.05 |
| Using rqt_console and roslaunch (0) | 2021.01.05 |
| Understanding ROS Services and Parameters (0) | 2021.01.05 |